Welcome to Ready & Able, formerly known as David LeRoy Plumbing! Although our name and brand have changed, we are still here to serve you and all of your plumbing, heating, cooling, and air quality needs!


Your air conditioning unit is a big part of what makes your home an oasis of rest and relaxation. Over time, you might notice your unit working harder to achieve the same level of cooling as it once did. Likewise, if you have a heating, ventilating and air conditioning system (HVAC), the heating may become less effective over time.
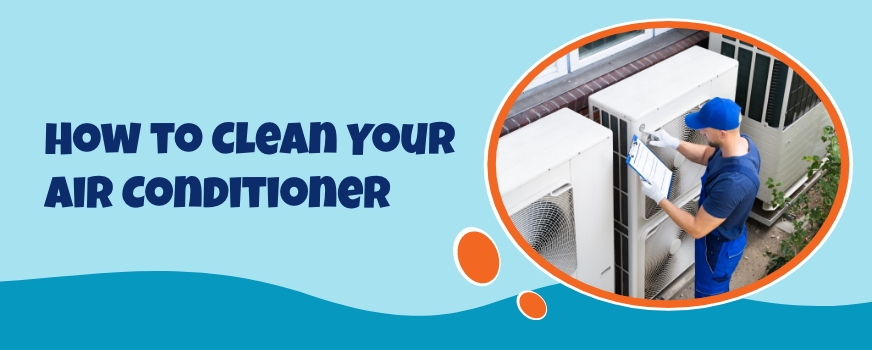
Cleaning your air conditioner is a critical element of maintenance, which will keep your system healthier for longer. That translates to fewer big-ticket repairs as well as a lower energy bill. With some time, patience and precision, you can clean your air conditioner for better performance.
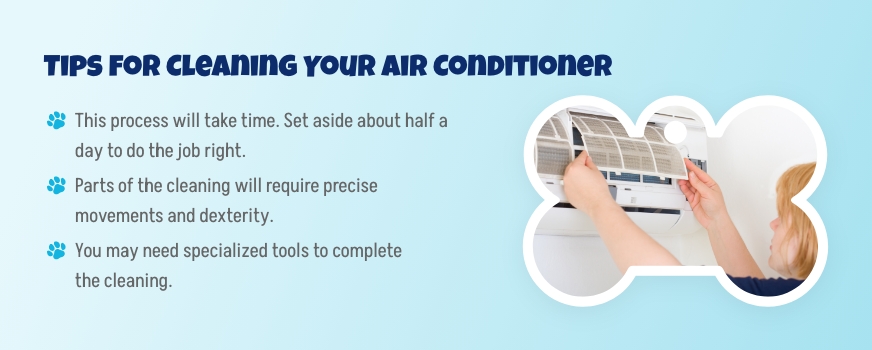
Before we get into how to give your AC unit a good clean, there are a few tips you should keep in mind:
While you can do this type of maintenance yourself, you may find that the patience and fine motor skills required for the task make this a job best suited to a professional. If your air conditioning unit is particularly dirty or shows significant wear and tear, it’s best to enlist the help of an expert.
Before you start cleaning your AC unit, it helps to understand a bit about how the system works. Air conditioners have an indoor component and an outdoor component, and each contains a different type of coil you’ need to clean.
You will find evaporator coils in the interior portion of the unit. These coils are usually made of copper, which conducts heat easily, and they contain coolant. The coils absorb heat as warm air passes over them, and the refrigerant evaporates to a gas state.
From there, the refrigerant transfers the warm air to the outside unit, where it passes through the compressor to the condenser coil. At this point, the compressor returns the refrigerant to a liquid state. The condenser coil then releases heat into the surrounding air with the help of an exhaust fan.
In order to clean your air conditioner, you have to work on both the indoor and outdoor components of your unit.
It’s up to you whether you want to start with the outdoor or indoor portion of the unit. We’ll begin with directions for the inside portion.
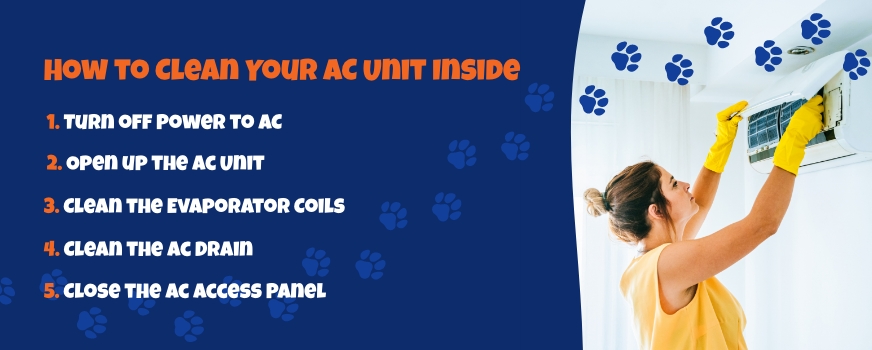
Air conditioners have a lot of moving parts, and because safety is paramount, you should turn off the power at your breaker box. This means you won’t have any lights, so this is definitely a daytime project. If your indoor unit is somewhere dark, like the attic, you will want to set up adequate lighting.
Your blower unit will have a door to the evaporator coil. Depending on your unit, you might have to remove foil duct tape. There are often a few bolts or screws holding the door in place.
If you have a soft brush, use it to remove dust from the coil. This dust will consist of whatever particulates populate the inside of your home. This includes skin cells and sometimes pollen, so if you’re prone to allergies, you may want to wear a mask.
The best cleaning solution is a no-rinse coil cleaner you can buy at your local home improvement store. This spray foams up and then drips into the unit’s drain pan, taking dirt and dust with it. Spray the foam on as evenly as you can, and get it in all the small areas you can’t reach by hand.
The best time to do this is on a warm day, so that when you turn the unit back on, the AC condensation rinses off the coils.
Once the coil cleaner has completely done its job, clean out the drain pan. Soap and hot water are a good place to start, and bleach helps with sanitization. Go for a 50/50 mixture of bleach and water. Pour the solution down the drain to make sure it’s clear. If you want a longer-term way to keep your drain from growing algae, you can purchase AC drain pan tablets at most home improvement and hardware stores.
If your bleach solution washes easily down the drain, you can skip this step. If it’s sluggish, your drain may be plugged. Without regular cleaning and maintenance, mold and algae can build up in the drain. It’s usually a PVC pipe around an inch wide, so it doesn’t take much buildup to clog.
Your drain may end outside, often around the condenser unit. Otherwise, it will let out into a utility sink or a drain in the basement floor. If your unit is in the attic, it may drain down one of your exterior walls. Follow the drain to where it ends and bring a wet/dry vacuum with you. If you are concerned about soiling the filter, you can remove it from the vacuum.
Take the vacuum hose and hold it to the end of the drain tube. You can prevent air leakage by holding a towel around the gap. If you want the tightest seal, duct tape the hose and drain together. Turn on the vacuum and let it run for two or three minutes to clear out any buildup that has accumulated.
Reattach the access panel, using the same screws you took out in the beginning of the procedure. If you have HVAC metal foil tape, use it to seal the top and bottom of the access panel. Don’t cover up the manufacturer’s label, as a technician may need it to perform maintenance or make repairs on the unit.
This is all you need to do for a regular cleaning, but you may encounter challenges you can’t handle on your own. If you have A-frame evaporator coils, you may find parts you can’t access because the coils are enclosed on both ends. If you haven’t cleaned your A-frame coils in a while, there’s a good chance you will need to enlist the help of professionals to get them completely clean.
Cleaning the outside unit and its condenser coils requires more labor than dealing with the interior portion of the unit. Because it’s constantly exposed to the elements, this part of your system gets extremely dirty extremely fast. You will also need more specialized equipment to get it clean. Follow these steps to keep your outside unit functioning at its best.
Once again, make sure the power is off. You can shut off your electricity at the outdoor disconnect box before getting started.
Take out the sheet metal screws on top of the unit. Once you have removed them, lift the fan unit and grille. Most units have enough slack in the wires to set the top down and lean it against the wall without having to disconnect any wires.
Depending on your unit, there will be a varying amount of debris in the bottom of the air conditioner. Entry-level models don’t usually have guards in place that stop debris from coming through the top of the fan unit, so you may have leaves, seeds or even tiny twigs in the bottom pan.
You can scoop the debris out by hand, or you can use your wet/dry vacuum to get it all out.
Learning how to clean AC condenser coils is simple. You will need a coil cleaning solution available at any home improvement store. Note that cleaner for condenser coils is extremely caustic and can cause burns. The fumes are also dangerous, which is why you shouldn’t use this cleaner on your indoor coils.
Mix up or dilute your cleaning solution according to the directions, and add it to your pump sprayer. Spray it onto the coils. It will foam up in a few minutes, and you can wash it off with your hose.
Do not use a pressure washer for this task. The fins are somewhat delicate, and the pressure can easily damage them.
Bent fins reduce airflow, so this step is crucial in maintaining efficiency. The best way to go about this is to purchase a fin tool. These inexpensive kits have teeth that allow you to comb a certain number of fins per inch. Make sure you’re using the right number of fins per inch for your unit. All you have to do is carefully comb the fins back into place.
Replace the fan cage and affix it to the unit with the screws you took out before. Make sure the area around the unit is completely clear for at least 2 feet in every direction, ensuring optimal airflow.
Dirt may settle underneath your unit and cause it to start tipping. If a condenser unit is out of level for too long, it may fail early and lead to costly repairs. If you find the condenser is not level, use shims to get it to where it needs to be.
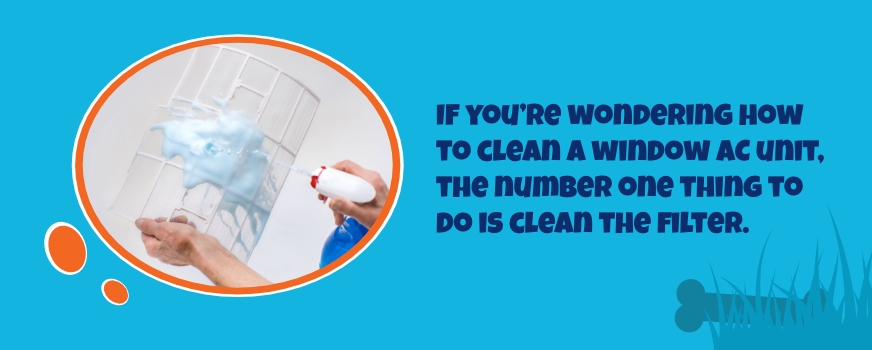
If you’re wondering how to clean a window AC unit, the number one thing to do is clean the filter. Central air conditioning units often have filters that are meant to be replaced rather than cleaned, so if you’re going to clean the filter on a large unit, you should check the instruction manual to see whether cleaning the filter is actually an option. Removal of the filter varies by unit, but the steps for cleaning filters are largely the same.
For regular maintenance, vacuuming is all you need to do. Use an attachment without a brush, as that may damage the filter. Run the vacuum nozzle up and down the length of the filter. You will likely see quite a bit of dust removed. If you have pets, you may have to go over the filter a few extra times to get out as much hair as possible. Don’t push too hard on the filter as you vacuum, or you may end up tearing or denting it.
Fill up your bathtub or another large container with room-temperature water. Add a little bit of regular liquid detergent and mix it well, so the water lathers up. Place the filter in the container and make sure it’s submerged. Move the filter back and forth, so it’s fully covered in the soapy solution, and let it sit for 10 to 15 minutes.
Don’t use brushes or other abrasive tools on the filter, as they may cause damage. Using a hose is a good way to remove dirt and debris. Hose off one side at a time until the water runs clean.
Mix up a one-to-one solution of vinegar and water, and add it to a spray bottle. Spray both sides of the filter, and give it 10 minutes for the solution to kill bacteria. Rinse the filter under running water before continuing.
AC filters need to air dry, and it can take several hours to become completely free of moisture. To aid in the process, you can put newspapers on the ground underneath the filter. Lean the filter up against the wall on top of the newspapers. Once at least three hours have passed, you can re-install the filter in your air conditioning unit.

A clean air conditioner is an efficient air conditioner, but taking the time to clean your AC unit yourself isn’t always practical. If you don’t own a shop vacuum, don’t want to handle chemical-based cleaning solutions or don’t feel like spending hours carefully combing your AC’s fins back into place, it’s time to call in the professionals.
At Ready & Able Plumbing, Heating & Air, we perform thorough cleaning as part of preventive maintenance. Our technicians not only clean your AC system, but also they follow a comprehensive checklist to ensure your unit runs well.
After the tune-up is done, the technician may provide you with a comprehensive report detailing the work completed as well as any need for repairs or adjustments. Ready & Able Plumbing, Heating & Air wants to keep your home running like a well-oiled machine, from plumbing to heating and cooling. Whether you need to schedule a minor repair or need emergency services quickly, we are your source for efficient and professional services in Central PA.
If you need reliable service in your corner, contact Ready & Able Plumbing, Heating & Air You can fill out our contact form, call us or even chat with us online.
Welcome to Ready & Able, formerly known as David LeRoy Plumbing! Although our name and brand have changed, we are still here to serve you and all of your plumbing, heating, cooling, and air quality needs!